Overview
Prodoc sends emails directly from the client to the destination using the email account configured on the logged in user*
It fully supports Office 365 mail accounts and authenticates via OAuth 2.0, which offloads the login to a Microsoft webview.
*Prodoc On Prem can also be configured to send emails using a Simple MAPI connection through to a local Outlook install
Steps to Configure
From Prodoc Home, open > Edit > System Configuration > User Details
Switch to the Email Settings Tab

Press "Office 365" under Set Defaults, (safe to do this, even if they're already set correctly)

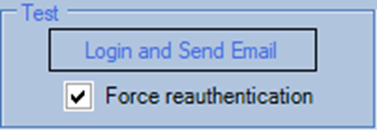
Tick "Force reauthentication" at the top, then "Login and Send Email"

If it warns about overwriting a Token, this is fine, press Yes

A browser window will open and navigate to the OAuth login at Microsoft, sign in using your Microsoft Account that you use for your email, not the @twprodoc.io account, following the instructions.

Prodoc is a Microsoft approved application, so it will eventually prompt for required permissions, have a read through then Accept (in some cases you may need to request approval from your IT provider, please contact your IT if you need help with this step).

Once the Microsoft login stage is complete, Prodoc will try to send a test email and ask for the sender email address and destination email address, if you leave it with your address it will just send one to you from you, which makes sense for a test.


Assuming the test was successful (give it another try if it wasn't, or contact your IT or Prodoc Support), it is recommended to set up at least the "sent messages" folder to ensure any outgoing emails are saved to the right place. If blank, press the refresh icon.

You can set up the "deleted" messages if you want, but it will never be used as Prodoc does not read/delete emails for user accounts.

Was this article helpful?
That’s Great!
Thank you for your feedback
Sorry! We couldn't be helpful
Thank you for your feedback
Feedback sent
We appreciate your effort and will try to fix the article